Track conversions
View and manage your conversion actions within the RAC platform.
How it works
Step 1: Create a conversion action
To get started, go to Advertisers in the top menu and select Conversion Tracking from the dropdown.
Select Get Started to create a new conversion action.
General
Name your conversion action clearly, such as newsletter signups.
Optionally, add a description or notes to provide additional context for this action.
Choose the primary goal you’re tracking: a Lead, Click, Purchase, or View.
Measurement
Configure settings that affect how the conversion action is recorded and attributed.
Value: Decide how the value of conversions will be tracked.
- Fixed: Assign a fixed value to each conversion, such as recording only actions worth
$1or more. - Dynamic: Specify a value when sending a conversion to RAC; if not provided, a zero value will be recorded.
- None: Discard any value provided with the conversion. This option tracks the total number of conversions without recording earnings.
Count: Decide how many conversions should be counted per unique click or interaction.
- One: Track each new conversion. Ideal for goals like
purchases,clicks, orviews. - Every: Track one conversion per click. Best suited for goals like
leadsorsign-ups.
Window: Set the time period after a click during which conversions will be counted. Options include:
15 days30 days60 daysOther- Manually set a conversion window by specifying the number of days after a user selects your ad.
To confirm your settings, select Create at the bottom right.
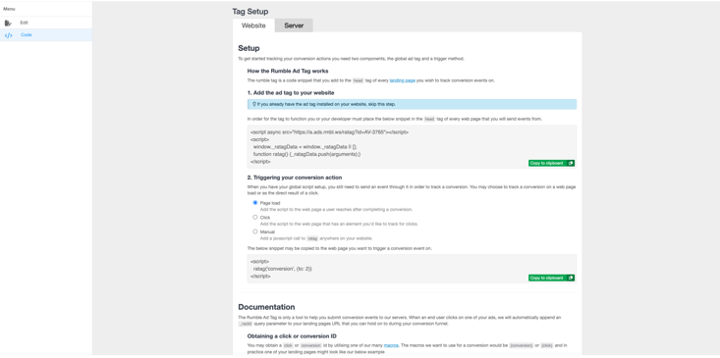
Step 2: Implementing the code
After creating the conversion action, you will be provided with documentation outlining how to implement the tracking code on your website.
Follow the instructions carefully to ensure accurate tracking.

If you have any questions or need assistance, contact our Help Desk.
Ecommerce conversion tracking
Shopify
For Shopify, pushing the conversion value (e.g., the total price of the cart) into your ad conversion tracking script involves accessing Shopify's Liquid variables, which are specifically designed for dynamic data rendering on Shopify stores. Shopify uses Liquid, a template language created by Shopify, for themes and dynamic content.
To dynamically insert the total price of the cart into your ad conversion tracking script on Shopify, you will typically use Liquid code to output the cart's total price. If you're aiming to capture the total value at the point of conversion (i.e., on the thank you or order confirmation page), Shopify provides several Liquid objects and properties that can be used for this purpose.
A common property to use for the conversion value is {{ checkout.total_price }} or event.data.checkout.totalPrice.amount, depending on the context. The checkout.total_price is available on the checkout page.
[img]
Here’s how you might adjust your script for a Shopify store, assuming you are placing this script on the order status page page found in shopify settings under checkout.
[img]
See also:
Code example
const script = document.createElement('script');
script.setAttribute('src', 'https://a.ads.rmbl.ws/ratag?id=AV-XXXX’);
script.setAttribute('async', '');
document.head.appendChild(script);
window._ratagData = window._ratagData || [];
function ratag() {_ratagData.push(arguments);}

analytics.subscribe("checkout_completed", (event) => {
  ratag('conversion', {
      to: XXXX,
      value: event.data.checkout.totalPrice.amount,
      }
  );
});
A few notes on this code snippet:
{{ order.total_price }}: Liquid variable outputs the total price of the order.| money_without_currency: Liquid filter that formats the price as a string without currency symbols (e.g., removing$).
Please ensure that this script is placed correctly within the Shopify theme files, possibly within the "order confirmation" page template or through Shopify's Script Editor app, if the modification needs to be triggered by order completion for Shopify plus users.
Using this approach assumes that your tracking script requires a numerical value without any formatting. It's crucial to test this implementation to verify that it correctly captures and sends the conversion values to your ad tracking system.
Remember, Shopify’s Liquid variables and filters are quite powerful, and there are many ways to manipulate data for your needs. You may need to adjust the snippet based on your specific requirements or Shopify’s updates to Liquid variables and filters.
BigCommerce
To push the BigCommerce conversion value into your ad conversion tracking and populate the price of the cart dynamically, you will need to replace [DYNAMIC PRICE CODE] with a code snippet that fetches the total cart value from BigCommerce's data. BigCommerce does not use a universal code snippet for all users due to variations in theme and customizations; however, this example provides a general approach to accomplish this.
BigCommerce provides access to global variables and objects that can be utilized within the storefront to pull various types of data, including cart information. For the purpose of conversion tracking, you're looking for the order total or subtotal.
If you're using Stencil, BigCommerce's current frontend framework, you can access order details through the order object on the order confirmation page. If you're looking to capture the total value at the point of conversion, you might use something like:
%%ORDER_AMOUNT%%
Or more specifically, in Stencil:
{{order.total_inc_tax}}
Therefore, your script tag would be modified to:
<script>
  ratag('conversion', { value: {{order.total_inc_tax}} {to: ###} });
</script>
See also: